
Step-by-step projects
Create a cinematic 3D title
Combine editable 3D text/material treatment, camera movement, lighting, atmosphere, glow, and a professional master workflow.
Updated August 28, 2026Create a cinematic 3D title
Goal
Create a 6-second title shot with readable 3D text, a slow camera move, controlled highlights, atmosphere, and a clean master. The point is to learn the relationship between typography, depth, camera, lighting, and finishing—not to hide the title under effects.
1. Create the composition
Use 1920×1080 or the required delivery size and a frame rate that matches the surrounding project. Add the main title and choose a bold face with enough stroke width to support depth/bevel treatment. Center the design and leave room for the camera move.
2. Build the 3D treatment
Enable the appropriate 3D/extrusion/material controls for the title. Start with modest depth and bevel. Use a restrained metallic/roughness response and ensure the front/side faces remain readable under the chosen light.
3. Light for form
Add one broad key light from above/side, a softer fill, and an optional rim or environment contribution. Rotate or move the camera slightly to make the bevel and depth catch highlights. If the title only reads because exposure is extreme, fix the material/light relationship first.
4. Animate the camera
Set an opening camera pose and an end pose about six seconds later. A slow push, orbit, or parallax move is enough. Refine interpolation so the camera accelerates/decelerates naturally and never clips through the title.
5. Add atmosphere and finishing
Use subtle fog/volume atmosphere if the shot needs depth, then add a small amount of glow/halation only after the underlying lighting works. Keep the effect stack reversible and compare bypassed/applied output.
6. Render and master
Test a 1-second section at moderate quality before increasing volumetric/shadow/render quality. For a high-quality handoff use ProRes 422 HQ/DNxHR HQX; use ProRes 4444 or OpenEXR when alpha is required.
Verification
Inspect the first, middle, and final frames plus the full camera move. Check text readability, bevel/counter shapes, flicker, light continuity, camera clipping, atmospheric stepping/noise, and preview/export agreement. Save/reopen before reusing the setup as a template.
Example project and visual checkpoint
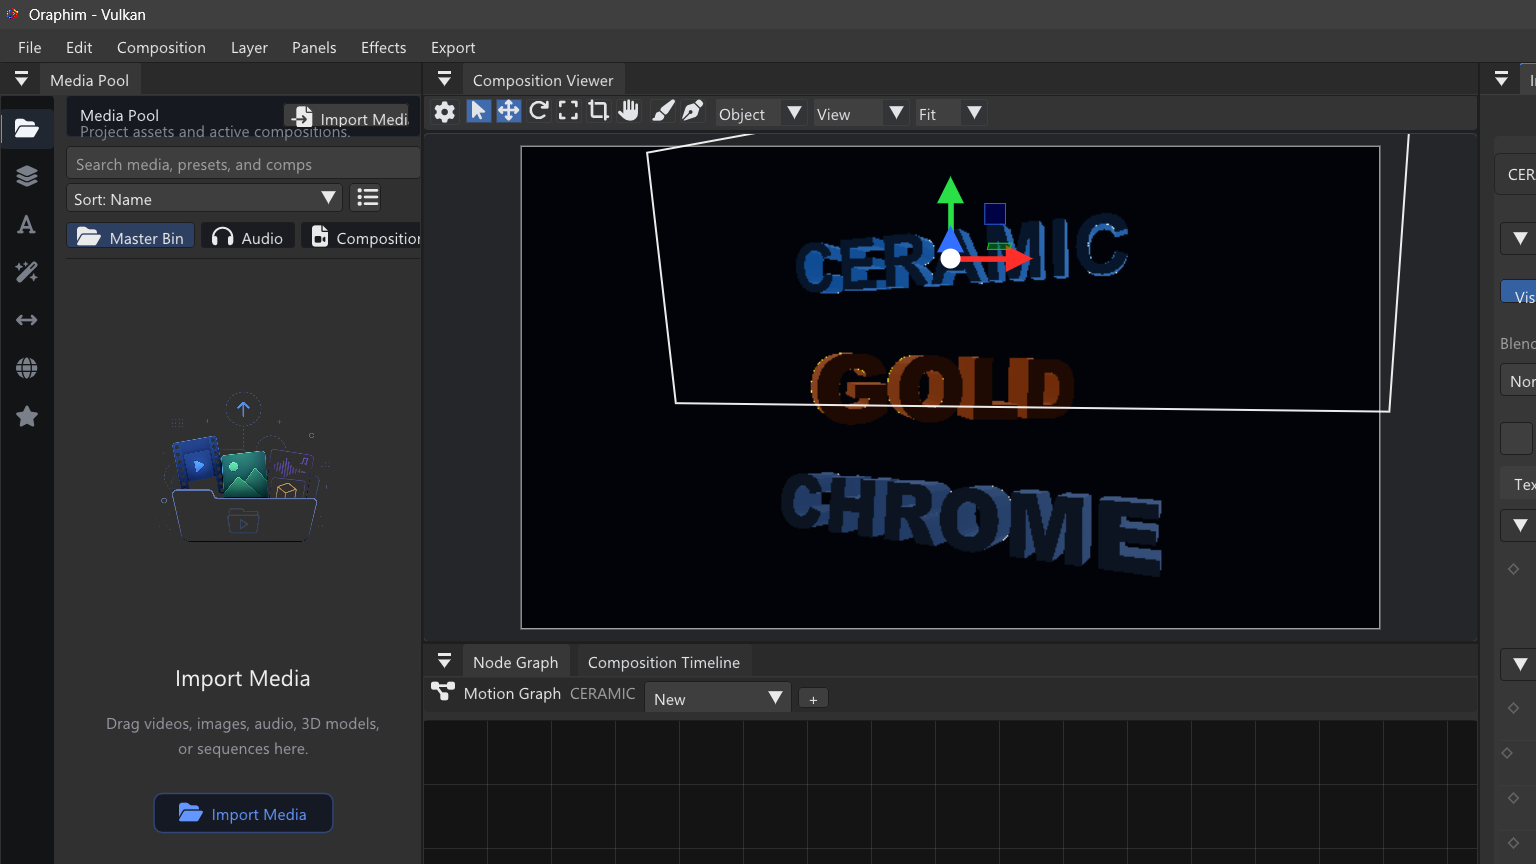
For a concrete exercise, build a six-second title reveal over a dark plate: one extruded text object, one key light, one supporting light, and a camera move with a clear beginning and end. Establish readable type and material response before adding atmosphere or secondary effects, then test a short render to confirm depth, transparency, and motion.
Quality check: play or preview the finished section at normal speed, inspect one representative frame at useful zoom, and confirm that the result still works after reopening the project. If the tutorial ends in delivery, export a short test before committing to the final render.